|
||||
A View for all Reasons - Part FiveWritten and published June 19, 1999 This should be the last article about views - unless someone comes up with a question I've left unanswered by the end of this week's column. So here goes... we'll see how well I've covered everything. This week we look at copying and moving files. Mix and MatchIn the past few weeks you've seen the best of using List and Icon views. Of course, nothing on the Mac is black and white (or even gray or platinum). Here on the Mac, you can have a colorful mix of views. You get to use the right view at the right time, when it's handy -- or just when you feel like it. To move a file from one folder to another while in list view, you click the arrow beside the folder that contains the file (so you can see the file you need to move). Then you simply drag the file up or down until it lands on the folder into which you want it to land. But what happens when your list of folders is longer than your screen can reveal? Then you need to do some scrolling - which can be easy, or can be a pain. To do the scroll thing:
Here are some things to know about scrolling: Sometimes it takes a moment for scrolling to begin. Scroll speed depends on the number of items in your window and how far you need to scroll. With a few items, it'll scroll faster than you can keep up with. With many items the window scrolls more slowly so you have more control - and a longer wait. It's not just the number of folders you have in the window that effects speed and the distance you need to scroll; it's the number of exposed files. If you have many folders open (via the blue arrow to the folder's left), you have many files to scroll over. To speed up scrolling, before you move files in List View, close all unnecessarily open folders. So what happens when you have a lot of files to move? One solution is to move all the files at once. This works if all the files are from the same folder. To move several files at once, use the usual Finder methods of multiple selection. The easiest method is to press Shift as you click on each file you wish to select. When they're all selected, click on any one of the selected files and drag it to the new folder. The others will come along for the ride. However, that can be tricky. What if you don't have the hang of dragging long distance and don't want to deal with dropping a bunch of files in the wrong place by accident. (You'll get the hang of it soon enough, but we're talking right now. And right now you just may not be ready.) Since this is the Mac, it's no big deal - there are other solutions. Or what if the files you want to move are not all from the same folder? By staying in list view, you'd have to scroll long distance several times. But, since this is the Mac there's a better solution. The solution:
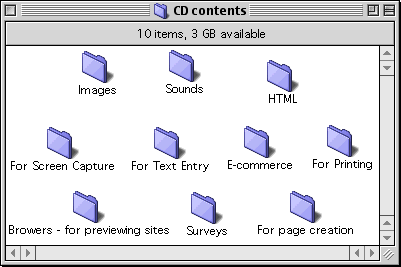
In the case of a CD I am creating, I have folders set up by category, as shown. Inside some of these folders are two more folders, one that says Mac and one for Windows. I collect things for this CD in another folder and once in a while drag items into the appropriate folder letting them spring open to get the files into the Mac or Windows folder inside.
From now on, as you work you can open any folder, put it in any location, and set it to any view that works best for you at the time. Review the past columns if you need ideas. Another Reader's Spring-Loaded Folders TipThe day last week's column appeared, Ken Bruno wrote in with this helpful comment. If you tend to let your mouse rest over folders as you think, and find the folders springing open when you don't want them to, this is your solution.
Next WeekNext week I'll talk about typing shortcuts. I hope you'll come back to join us. Maybe it'll help your fingers do less walking. |
||||
|
|
|
• • • Next Column
|
||