


[This article was written for OS 10.4.x, aka Tiger. The Dock's look changes in 10.5.x, Leopard. However, the behaviors discussed here remain the same.]
Dock Savvy & Strategies Part 1: The App Section of the Dock
As we work on our Mac (or any computer), we need access to two things: our programs and our files. The Dock is one of the main ways we can access these items. It's like a private butler, standing there ready to hand you everything you'll need for your day. But I've noticed that most people don't realize the Dock's power.
Apple starts us out with most of their pre-installed apps in the Dock so we get to see that the Dock is a great place to launch programs from. At the same time, Apple starts us out with common file folders in the Sidebar, so we immediately see that's a handy place to stash folders. But, in fact, it's also handy to place folders in the Dock, and we can actually stash programs in the Sidebar.
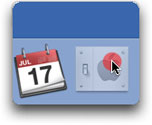
The Dock — at the bottom of the screen
![]()
(It can be switched to either side.)
The Sidebar
What's the Sidebar?
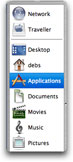
The Sidebar is the section in the left side of every Finder window. It's the section that shows your Desktop, Home folder, Applications, Movies, Music, and Pictures, giving you easy access to those locations. It also gives you easy access to your hard drive, CDs, DVDs, other hard drives, and other such volumes.
The Sidebar was introduced with OS 10.3 (Panther). If you're using 10.0, 10.1, or 10.2, you will not have a Sidebar.
I'll cover the Sidebar fully in upcoming articles.
With both the Dock and Sidebar, it's easy to add and remove items. So rather than thinking of your Dock and Sidebar as areas that are set up for you and remain static, start thinking of them both as ever-changing tools. In this article I focus on the Dock. I'll address the Sidebar after the Dock series.
Applications and the Dock: what's right for the left (or top)?
If you look closely at the Dock, you'll notice a dark line in it. One side of this line is designed to house icons of your favorite programs. The other side is for files and folders. Bear this in mind as you read this article.
- If your Dock is across the bottom of your screen, the applications reside on the left side.
- If you have moved the Dock to the left or right side of your screen, the applications go into the top section.
Any program can be Docked, but if you Dock every app on your hard drive, you'll overcrowd the Dock and counteract its usefulness. Your goal will be to find a balance. As you read this, start choosing the apps that'll provide benefit in the Dock. As you read the next article in this series, you'll use the remaining area to stash your document folders.
How do you determine what is best to keep on the left (or top)?
Consider these benefits as you look at each app that's in your Dock right now. Dock the applications that seem like they'll be of most benefit to you — recognizing that, as what's beneficial changes, you can change the icons there to accommodate.
Fastest Launching
The most obvious benefit is that, when an app is in the Dock, you can launch that app with just a click.
Not a bad benefit but...
you can launch any app in the App Launcher I covered previously, with what amounts to just a click too: click and hold, drag to the app, release the mouse. See, a single click.
So ask yourself... Do you launch this program every day? Or does it just sit there for the most-part? If you really use it, keep it there for now. If not, it makes more sense to remove it from the left side and to give yourself access to the program another way.
Drag and Drop File Opening
The Dock provides drag and drop launching. 
The best way to explain this is with examples:
- You're given a Word document, and you want to look at it quickly rather than taking the time to launch Word. TextEdit can open a Word (.doc) file and it launches much faster than Microsoft Word.
So instead of double-clicking the file, you can drag the file onto the TextEdit icon in the Dock to have TextEdit open the file.
- Your JPGs open in Preview or iPhoto by default, but you need to edit a JPG in Photoshop or GraphicConverter so you skip the double-click and drag it onto the app of choice in your Dock.
 You've got a PDF file that was created in Adobe Illustrator. Your preferences are set to open a PDF file in Preview or Acrobat when you double-click it, but you want this graphic to open in Illustrator so you can work with it. Rather than double-clicking the file, you can drag it onto Illustrator in the Dock.
- (This one is far-fetched, but you'll get the idea.) Someone sends you a vCard. Double-clicking it will add it to your default address book, but you want to add it to another contact program for some reason so you... yep, drag it onto that app in the Dock (if that app is in the Dock).
A great benefit but...
if you have easy access to the desired app in your own App Launcher (or by some other method), you could launch the app. Once launched, its icon appears in the Dock so you have the drag and drop launching benefits.
and...
the MacOS also has an Open With feature built in. Simply control-click (or right-click if you're wise and have a two-button mouse), drag up to Open With, and choose an available program. The Mac lists all of your viable apps based on the type of file you're trying to open.
Seeing when a Program is Running
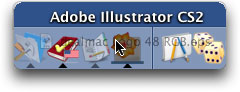
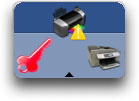
Whenever a program is running, a black triangle appears below (or to the left of) the app's icon in the Dock.
In this example — shown both as a left-side Dock and a bottom Dock — TextEdit and Preview are launched.
iPhoto and iTunes are not running but are docked for convenience.
A benefit but...
that's the case for any program, regardless of whether it lives in the Dock and where you launch it from. All running programs appear in the Dock and all have the black triangle.
Show in Finder
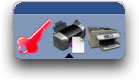
When you click any icon in the Dock and hold a moment, the menu that appears offers Show in Finder. Selecting this will open the folder in which that icon resides.
(You're seeing two views here: from a bottom Dock and a left-side Dock.)
Looking in your Applications folder, you may not be able to find a program like Word, which is buried in the Microsoft Office folder. But using Show in Finder takes you directly to it.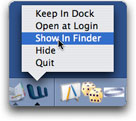
 I can think of just two occasions when this is handy. One is when you need to create an alias of the program. The second is when you need to move an app to the Trash so you can replace it with a newer version that needs to be manually installed.
A benefit but...
that's the case for any program, regardless of whether it lives in the Dock and where you launch it from.
In short, your Dock choices come down to convenience.
If you use a program daily (or a heck of a lot), Dock it. If infrequently, remove it.
Apps You Can Definitely Remove From the Dock
There are two programs you can absolutely remove from the Dock.
- System Preferences — because the very same app is available from the Apple menu, and it's easy enough to go there. Poof the Prefs. (You'll understand "poof" within the next 10 lines.)
- QuickTime — because, when you double-click your movie, it'll launch for you. Unless you're into launching QuickTime as a way to seek out videos, which you can do via iTunes, undock the blue Q.
Removing an Application from the Dock
Now that you're probably ready to remove some programs from the Dock, here's how.
Poofing — the fun way to remove an app
This is fun, so turn up your Mac's volume and watch closely as you do this — just for the fun of seeing and hearing the poof!
1) Click on it in the Dock.
2) Immediately drag the icon off the Dock.
Drag up for a bottom Dock, right for a left-side Dock, and left for a right-side Dock. Here I show a bottom Dock.
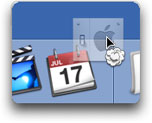
3) Release the mouse anytime after the tip of the arrow clears the Dock.

If your app jumps back into place or moves sideways instead of poofing, you've released the mouse before your cursor really cleared the Dock. Try again.
Trivia: "poof" is not only the sound you hear; it's also the name of the effect's sound and graphic.
The menu — the boring way to remove an app
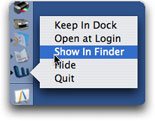
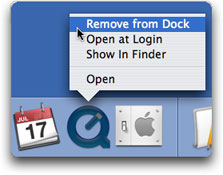
1) Move your mouse over that icon and click and hold a moment until the menu appears. One of the menu items will be Remove from Dock.
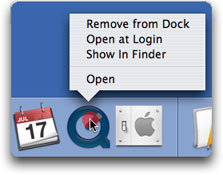
2) Drag your mouse to that command and release the button to issue that command. (Here I show a bottom Dock.)
You can delete only one app at a time.
Remember, you're not trashing that program. You're just deleting a special type of pointer to the app. Your item will still be in place and still function as before.
Some Apps to Add to the Dock
Now that you've weeded out your Dock apps, here are some to add to it.
- Preview. It's an all-around helpful app. You can use it to view PDFs, JPGs, and more. I'll talk about those benefits in another column.
- TextEdit. This miniature word processor is terrific to launch for quick note-taking. It'll also open Word files, database exports, Quicken formatted files you download from your bank.... You won't have all the proper formatting, but you'll be able to read the contents quickly when you just need to see what's in there.
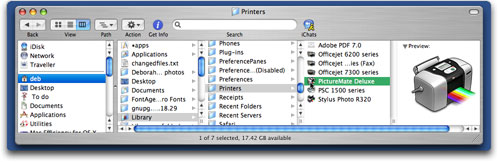
- Your printer(s). Next time you print, while the Printer's icon appears in your Dock, click on it and choose Keep in Dock. Having it there makes it easier to check up on your printer at times.
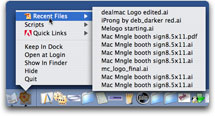
Note: If you want to get your printer(s) docked right now, click your Home folder in the Finder window's Sidebar, then Library, then Printers — as shown here. You'll find your printer app(s) in there.
Adding an Application to the Dock
There are two ways to add an application to the Dock. In both of these I show you a bottom Dock, but it works the same when the Dock is at either side.
Adding an application by the menu
1) While the app is running, it appears in the Dock. Move your mouse over that icon and click and hold a moment until the menu appears.

One of the menu items will be Keep in Dock.
2) Drag your mouse to that command and release the button to issue that command.
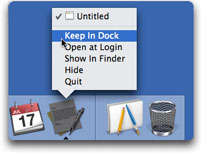
If, instead, you see Remove from Dock in the menu, you know that app is already docked.
Dragging an application to the Dock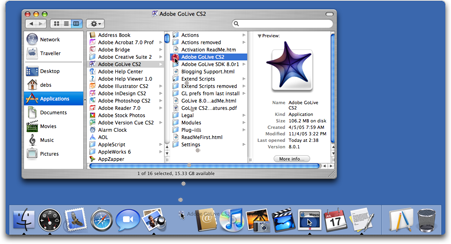
Open its enclosing folder (the Applications or Utilities folder most likely) so you can see its icon.
Then drag the icon in between any program icons that are already in place to the left (or top) of the line.
As you drag over the Dock, existing icons will move out of the way for their new Dock-mate.
Release the mouse when it's in the desired position.
In case you're wondering, you can add multiple apps at once. Simply select them all before you drag.
The Dock may look full even before you begin to add more, but it's not. As you add more programs, the Dock will accommodate, brilliantly downsizing the icons once the Dock reaches maximum width.
Not really a moving experience
It's important to understand that, even though you're dragging the app to the Dock, you're not really moving it. It will seem that way, but the OS is really creating a special alias of that app.
Thus you can remove the app's icon from the Dock without worrying that you'll be deleting the program from your computer. It'll still be there, I promise.
Wondering what happens if you Dock a program, then delete that app later?
 No harm done. When you click that icon in the Dock, nothing will happen because the associated app is no longer present. Next time you reboot your Mac, you'll see a question mark over the icon. Simply drag that question mark off the Dock like you undock any app.
Helpful menus from the Dock
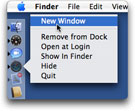
Not many programs take advantage of this, but when an app is running, the Dock may provide a helpful menu. To discover these menus, click an icon in the Dock, keeping the mouse pressed a moment, and look closely at the menu that appears.
For example:
- The Safari icon in the Dock offers New Window.
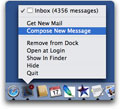
This window opens behind whatever app is active at the time, though, so you still need to click to bring the window forward. (You can't go directly to a site even if you have it bookmarked.) - The Mail icon provides Get New Mail and Compose New Message.
- Activity Monitor (an Apple Utility) lets you access each report window and even shows activity in the Dock.
- iTunes provides playback controls.
- SpellCatcher lets you do various things from the Dock.
- Default Folder provides access to various files and folders when docked.
Pictured here are three examples. The first shows a side Dock. The others depict a bottom Dock.
Bear in mind that these menus only appear when the app is running.
They are of no consequence when considering whether to keep an app docked.
Animation and Reporting
When a program is running, the Dock icon sometimes provides feedback about what's happening with that app. For example, the Mail icon tells you how many new unread messages await in your inbox, and printer icons show you the printing progress. Watch closely and you'll see the icon change to show the page's progress as it prints.

This is not a reason to keep an app docked, as it'll always happen when the program is running. But it's a good reason to keep icon sizes comfortable for your eyes.
Don't worry too much about putting too many apps in the Dock — for now. After you read part 2 and have placed all other desired items in the Dock, you'll start to see the way the Dock works and you can start removing some. You'll find a balance between benefits of having items there and icon sizes.
For your friends still using OS 8 or OS 9, the somewhat parallel article is Pop-up Tab Launchers.
So until next time...
Happy Dock adventures.
Happy launching.
PS: If you like this article and want more, please sign up to receive a simple email each time I publish a new piece. It's easy.
Thanks to...
Other World Computing, Masterpiece Banner and MacSpeech
for sponsoring this article.