


[This article was written for OS 10.4.x, aka Tiger. The Dockís look and behavior covered here changes in 10.5.x, Leopard. A new article for Leopard will be published shortly.]
Dock Savvy & Strategies Part 2: The Files Side of the Dock

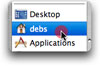
This is where it is
if you've changed
your Dock
to either side.
What’s the files side of the Dock?
It’s the side where you can dock your own folders and files!
This is where it is by default.

Apple doesn't start us out with anything there that demonstrates its power — but you'll see plenty of power very soon!
If you followed Creating a Docked Application Launcher, you have an idea of this power.
Now let's get you to your files as fast as possible.
Mac users prior to OS X may notice that the Dock is the present-day Apple menu.
Quick access to all of your documents
Ultimately, all of your files are (or should be) filed into your Documents folder — or your own personal files folder (per this sidebar). Placing that folder in the Dock provides the fastest access to it. In effect, a docked Documents folder is a Document launcher right on your Desktop.
To create this:1) Click the OS icon in your Dock.

This opens a new Finder window or, if you already have one open, brings it forward.
2) Click once on your Home icon in the Sidebar to select it.
3) This opens your Home folder, revealing your Documents folder.
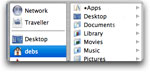
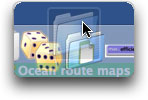
4) Click Documents and immediately drag it to the files side of the line, then release.
Don't release the mouse while over the Trash or your folder may land there!
Result:
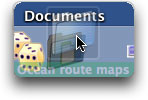
You now see your Documents folder in your Dock.
![]()
The Documents folder's special icon is created by the system.
Benefits of docked folders
Now that your Documents folder is in your Dock, you can start to see benefits of docking a folder. These benefits extend to any files folder, of course, so consider these benefits as you think about accessing your own project folders.
You can open the Docked folder or file immediately.
Instead of opening a Finder window, then clicking on the folder in the Sidebar or navigating to it — you arrive directly inside your desired folder simply by clicking once on the Dock. Or, if it's a file that's docked, that single click launches the document.
Try this:
Close your open Finder window and any other open Finder windows.
Now, click the Documents folder in the Dock and see how it opens right to that folder.
You can view — and open — the folder's contents in a menu without opening that folder.
 Any docked folder can display a menu-type of listing that shows you every file and folder directly within that folder — and everything within each subfolder as well.
Try this:
(Optional) Close all open Finder windows, so you can clearly see what happens.
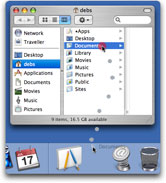
Now, click the Documents icon — and hold your mouse down until a menu pops up.
This menu lists all items in your Documents folder. For each folder in there, you see that folder's name and a submenu.
- If you drag your mouse to any folder, then release, you'll open a Finder window directly to that folder.
- If you drag to a folder and then slide over to a any item within that subfolder and release, you'll open a Finder window directly to that subfolder.
- If you drag to any file and release the mouse, you'll open that file.
"Control-click the folder" means press the Control key as you click on the folder. Control-click is the one-button Mac equivalent to right-clicking.
If you right-click or control-click on your Docked folder, the content menu appears and remains visible. This enables you to use your keyboard's arrow keys to select a desired folder or file. At a sub-folder, the right arrow opens a subfolder and the left arrow backs out of a subfolder. Hit Enter to open any selected folder or file.
You can file documents by dropping them onto the folder's icon.
Note: If you don't really want that file in this folder, immediately go to the Edit menu and choose undo to move it back.
When a folder is in your Dock you have the easiest way to add a file into the folder.
Try this:
Click on any file that's on your Desktop and drag it right over the Documents folder icon in your Dock. When your mouse and the file are over the Documents folder and the Document's folder darkens, release the mouse.
As you drag a file or folder over any folder, its icon will darken. (A generic folder will even appear to open.) At this point, when you release the mouse, the item being dragged will land inside the darkened folder. You can also file an entire folder this way; even multiple items.
The trick: it's not having the file's icon over the target folder that does the trick; it's having the tip of the arrorw be over the target folder.
This only moves the item.
This files the item.
You can jump directly to where the folder or file is located.
Want to get right into a folder that's docked and see it as an open Finder window?
This is great when you want to re-file the entire folder, change it's name, or change it's icon.
 Try this:
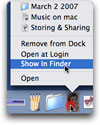
Click on the folder in the Dock, hold until the menu appears, then choose Show in Finder.
This command is listed below your files, closest to the Dock. If you have a lot of files, you may have to scroll down to get to the command.
This opens the folder in which your Docked folder or file is located — and selects the folder/file for you.
You can set a folder to open automatically when you log in.
 If, for some reason, you want a folder to open for you every time you start your Mac or log into your account, you can.
Try this:
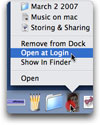
Click on the folder in the Dock, hold until the menu appears, then choose Open at Login.
This puts a check mark to the left of that command. If, later on, you don't want this folder to open automatically anymore, repeat. This will uncheck the command.
(This became available in Tiger; it's not in Panther.)
What do you not get with folders that are Docked?
One benefit you don't get in the Dock that you do get in a Finder window, or with a folder or alias on the Desktop, is spring-loading. That's when, while dragging an item, if you pause a while over the folder, the folder springs open so you can drop the item some place specific within that folder. And after you do, the folder springs closed. (You'll find the preference for spring loading under Finder -> Preferences, in the General tab.)
Doc more folders for even quicker access to currently important documents
When you're working on a project, the faster you can get to it, the better.
Now that you know the benefits of docking folders, consider clearing up your Desktop or ending unnecessary trips through your Documents folder. Start docking. You might as well try it. If you don't like having a folder docked you can always undock it.
Know your folders at a glance
With customized project folder icons, you'll have a great-looking Dock full of easily identifiable folders. See Customizing Your Folder's Icons.
Have you been keeping your project folders directly on your Desktop to get right to them? Or have you been good about keeping the actual project folders within your Documents folder, so you've put aliases of the folders on your Desktop?
The better way is... you guessed! — to take advantage of the Dock.
The Dock is like one big alias holder.
Here's how to get folders and aliases into your Dock and off your Desktop.
Instead of folders on your Desktop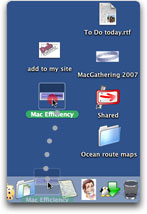
If you have a project folder sitting on your Desktop, try this:
Click on it right there on the Desktop
and drag it to your Dock, anywhere between the dividing line and the Trash can.
Here, I demonstrate dragging my Mac Efficiency folder.
If that folder was customized, you have an easy-to-identify folder in your Dock and you can find it and get to with ease.
If you have more customized folders on your Desktop, you can dock them all now. Hold off on moving the generic folders; it's easier to customize first.
Once a folder is docked, there's no need for it on your Desktop, so you can put it away.
Generic folders in the Dock
 A docked generic folder looks nice in the Dock and functions perfectly well. However, you won't be able to know which folder it is until you move your mouse over that folder.
This is fine when you have just a couple of generics in the Dock, as you'll recall what they are. But, when you start docking a bunch of folders, you'll want custom icons.
Changing your custom icons
When a folder is in the Dock and you change that folder's icon, the new icon won't appear in the Dock. You'll need to undock (poof!) the folder, then Dock it again.
Instead of aliases on your Desktop
If you've been great about keeping your folders within your Documents folder and have aliases to those folders on your Desktop, you’ve been doing well — but docking the original folder(s) is even better.
When you Dock an alias, the Dock icon points to that alias, not the folder. If you delete that alias, the Dock icon fails.
So, for aliases of of folders on your Desktop....
1) Control/right-click on the alias and choose Show Original.
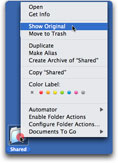
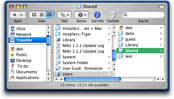
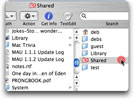
2) The actual folder is revealed and selected.
3) (Optional) Customize that folder so you'll recognize it.

4) Drag the original to the Dock.
You can then delete the alias.
Docking folders that are filed away
Now that the folders or aliases of folders on your Desktop are cleared from the Desktop and filed away, have a look inside your Documents folder. Do you have files in folders neatly filed in there? Of those folders, which ones do you access most often? Consider Docking them.
Docking individual files
I've said you can dock both folders and individual files, but so far have only mentioned folders. That's because, for the most-part, it's more efficient to place folders in the Dock. Put too many items in the Dock and its icons become so small you can't recognize them and you'll defeat the purpose to an extent. However, there will be times when it's helpful — and efficient — to place a single file in the Dock. For example, you might keep a running To Do list.
If you have such a file now, go ahead and drag it into the Dock. You may also want to customize it's icon first. With a custom icon you won't be able to tell it's a TextEdit file, a Word doc, or whatever, but you'll know it's your To-Do list and you know which app it uses.
If you have that To Do list as an alias on Desktop, control/right-click on it, choose Show Original, then Dock the original. It's the same as for a folder.
In the next article or two, I'll discuss more about how the Dock works, so you may find you don't need your individual files in the Dock — that there are other ways to achieve efficient access. That's fine, since it's so simple to remove them from the Dock. For now you'll have the convenience, and that's what counts.
About moving and renaming
Worried about what happens if you move your folder or file around on your hard drive later? No worries. The icon in the Dock will still find it.
Worried about renaming a folder or file? Again, it's not a problem. The icon in the Dock will still work. In fact, it's name will change to reflect the new name.
Adding a Folder or File to the Dock
There is just one way to add a folder or a file to the Dock. That is, to drag it there. As discusssed, as a rule, you should Dock the original item, not an alias.
To dock a file or folder:
Open its enclosing folder to view that item. Then drag that it over the Dock anywhere between the line and the Trash, just like you did for the Documents folder at the start of this article. As you drag the folder or file over the correct side of the Dock, existing icons will slide over to make room for the addition. Drag to where you want it, then release. (You can reposition it later, too.)
To add multiple items at once, select them all and drag as normal. They’ll land beside one another.
Remember, although you're dragging the item, you're not really moving it. You're actually really creating a special alias.
Removing a Folder or File from the Dock
When you're no longer benefiting from having an item docked, remove it to make room for items that serve you better. You won't be deleting file or folder — just deleting a special alias. Your item will still be in place, functioning as before.
You can undock any item either if these two ways:Method 1:
Simply click on it and immediately drag it off the Dock. Release the mouse any time the tip of the arrow is off the Dock. [Watch and listen — the poof is fun.]

You can only delete one item at a time; items in the Dock can't be selected.
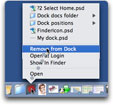
Method 2:
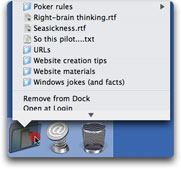
Click on the icon and hold down the mouse
until you see the menu. Then choose Remove from Dock.
Something to remove — the internet icon
Apple puts one item in the files section for you. It's an internet bookmark of sorts, that takes you Apple’s OS X page. Keep it if you’d like, but it’s easy to get to at Apple.com, so I recommend dragging it off your Dock. There are better ways to use the space.
If in OS 8 or 9...
If you tabbed folders in OS 8 or 9, you’ll see similarities to the Dock. However, (at least through Tiger and into Leopard folders in the Dock are not spring loaded.
There are so many great, easy ways to get to your files on the Mac. We've just begun to scratch the surface. As you discover more methods, your Dock is likely to evolve. For now, start experimenting. You'll get a feel for what you access and don't, for what works for you and for what you need to tweak. Dock to your heart's content. Undock at will. Heck, you may find yourself putting folders in the Dock just because you like their icons.
Enjoy.
Until next time...PS: If you like this article and want more, please sign up to receive a simple email each time I publish a new piece. It's easy.